
Crooked Gap Clubhouse
Crooked Gap Clubhouse starts out in the design phase with Barbara’s sketch:

During the initial design process, Barbara, Jeff & Marco spend a day doing a “stick-out” on site, using rough strips of wood to layout the shape of the Clubhouse on the hillside.

Then later, after building, staining & detailing the structure in our shop, we bring in the pieces to install. The deck goes in 1st, matching the original stick out to a “T”.

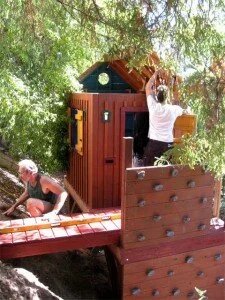
On this site, the truck is parked below and every play structure piece, along with all tools and materials, are lugged up the hill!

The Gable roof is in 2 pieces, and like everything else, has to come up the hill, across the bridge and then up into place.

The crew, happy but weary at the end of the day from a job well done.


See our newest custom Play Structures here…